
Small Closet Organization Ideas for Renters: A No-Drill 5-Zone Plan
A small rental closet usually has the same basic problem: one rod, one shelf, a patch of floor, and far more jobs than the layout was designed to handle. The answer is not to fill every inch with organizers. The most useful small closet organization ideas for renters make daily clothes easier to see, reach, and put away without permanent built-ins.
This guide uses a five-zone plan: daily hanging, upper shelf, floor, door or side access, and seasonal overflow. Measure the closet first, decide what deserves prime access, and add only the removable storage that solves a real problem. That order matters. A second rod can help with shirts and pants, but it can also ruin the only space available for dresses. An over-door organizer can add capacity, but only if the door still closes and latches normally.
Quick answer: edit the wardrobe, measure the usable space and door movement, protect one long-hang lane, use the top shelf for lighter low-frequency items, and keep the floor simple enough to clean. Treat “no drill” as an installation method, not a guarantee that every product is suitable for every rental surface.
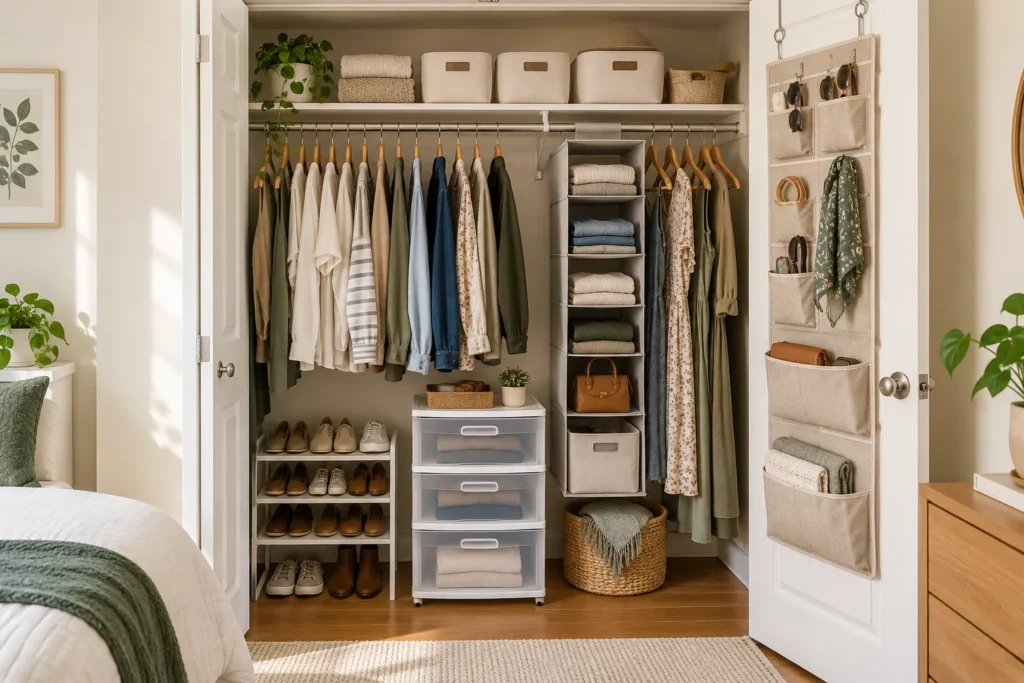
Start With the 5-Zone Rental Closet Plan
Instead of shopping by product category, divide the closet by how often you reach for things. The easiest area should serve the clothes you wear now. The least convenient area should hold the items you need only occasionally. This keeps the system useful on an ordinary weekday, not just tidy in a photo.
The five zones can overlap in a very small closet, but each should still have one clear job. If the same top shelf contains spare bedding, handbags, winter clothes, paperwork, and random shopping bags, the problem is not a lack of containers. It is a lack of priority.
Zone 1: daily hanging
Give the center of the existing rod to the clothing you wear most often. Group by type or by routine, whichever makes getting dressed faster. Jackets used once a month do not need the same prime position as the shirts you wear four days a week.
When two people share this zone, our guide to organizing a small closet for two people helps give each person a clear home for daily clothes.
Zone 2: upper shelf
Use the top shelf for lighter, lower-frequency items that can be retrieved without awkward lifting. Seasonal clothing, an occasional bag, or a labeled soft bin can work here. Keep heavy boxes and fragile objects lower unless the shelf and retrieval method are specifically designed for them.
Zone 3: floor storage
The floor is useful when it has a defined footprint. Shoes, a compact drawer unit, or one basket can work. A floor covered edge to edge with boxes becomes hard to vacuum and makes anything at the back difficult to retrieve.
Zones 4 and 5: door access and seasonal overflow
A hinged door may support an over-door organizer or suitable removable hooks when clearance allows. Sliding and bifold doors have different limits, so never assume the door is free storage. Seasonal overflow should sit in the least convenient but still reachable zone, usually a labeled upper bin, under-bed storage, or another appropriate location outside the closet.
Edit the Closet Before Adding Organizers
Organizers cannot fix an inventory problem. Pull out obvious duplicates, damaged items you will not repair, pieces that no longer fit, and clothes that have not earned space in your current routine. You do not need a dramatic declutter. You need enough breathing room that a clean shirt can go back on the rod without compressing ten other hangers.
Make three temporary groups: keep here, keep elsewhere, and exit. “Keep elsewhere” matters in a rental because a tiny bedroom closet often becomes storage for luggage, linens, cleaning supplies, and paperwork simply because no other home was assigned.
Run a real-life wear test
For a few weeks, notice what actually moves. Turn hangers the same direction, place frequently worn shoes in one row, or keep a simple note on your phone. The point is not to create a perfect tracking system. It is to distinguish daily wardrobe from aspirational or seasonal wardrobe before buying a larger organizer.
Move non-closet jobs somewhere better
If the closet is also storing spare towels, suitcases, hobby gear, vacuum attachments, or gift wrap, ask whether those items need clothing-level access. Moving one bulky category to a better location can create more usable capacity than adding another shelf inside the closet.
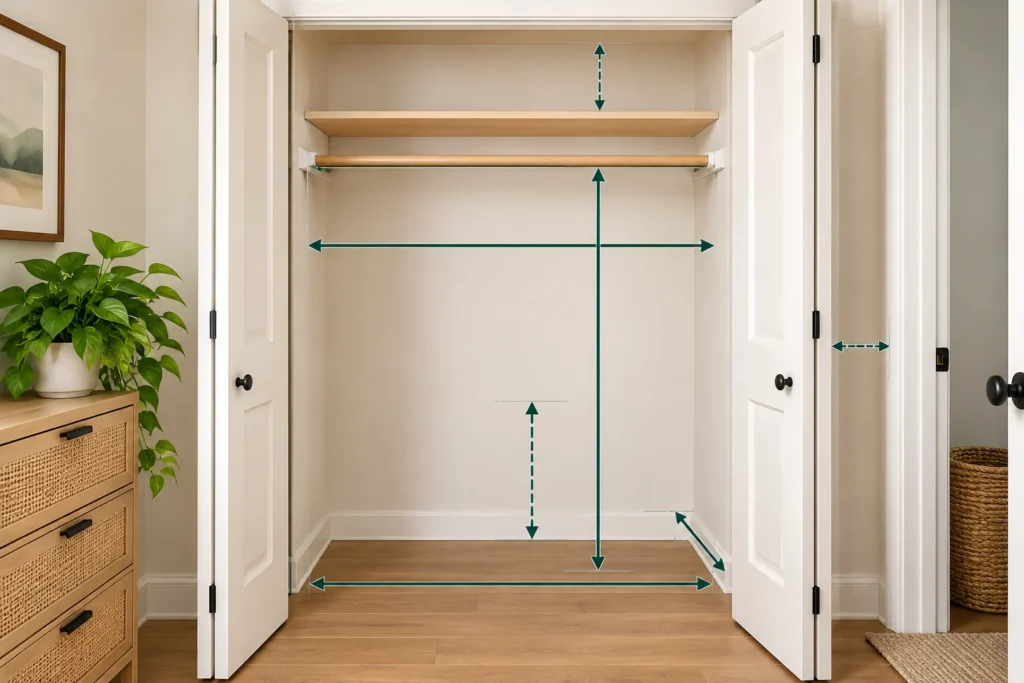
Measure Seven Things Before You Buy
Use a tape measure and write the numbers down. Record usable width, usable depth, total height, existing rod height, top-shelf depth, space below short garments, and door opening clearance. Then note hinges, trim, baseboards, vents, outlets, and anything that reduces the clean rectangular space shown in a product photo.
Small closets punish optimistic measuring. An organizer that is one inch too deep can stop a sliding door. A drawer unit can fit under shirts and still fail because its top drawer cannot open past the door panel.
For a closet with a narrow doorway, our small reach-in closet organization guide helps plan around the opening and the space hidden behind door panels.
Measure the interior, not the listing photo
Measure from the actual finished surfaces that limit the organizer. Current reach-in closet dimension guides commonly use about 24 inches as a typical depth, but that is a planning convention, not a promise about your apartment. Older or converted closets can be much shallower. Use your number, especially with a closed door.
Measure hanging clearances
Measure the drop from the rod to the hem of your shortest and longest garments. Short shirts may leave enough vertical space for a second rail or drawers; dresses, coats, and long cardigans do not. Measure the hanger plus garment depth too if shoulders already brush the door.
Check door, drawer and floor movement
Open every door completely. Slide bypass doors both ways. Fold bifold doors. Pull proposed drawers to full extension with the door in its real operating position. Mark the footprint of a shoe rack or drawer unit with painter’s tape and walk past it. The usable measurement is the space that remains functional after everything moves.
Build Zone 1: Daily Hanging
The hanging rod is the most valuable zone in many small rental closets because it is visible and fast. Make it serve the wardrobe you actually wear. Start by grouping short garments together and long garments together. That simple sort shows whether a second hanging level can help without forcing every category into the same height.
If the existing layout has just one rail and a top shelf, follow our guide to organizing a closet with one rod and one shelf before adding another hanging level.
Double-hang only the short-garment section
A removable lower rod can be useful beneath shirts, blouses, folded-over trousers, or shorter jackets. If your closet has no built-in shelf at all, see our small closet with no shelves hanging-zone plan for a rod-budget approach. Do not run it across the full closet by default. Test the vertical drop of both rows while loaded. Sleeves and hems should not pile onto the lower rail or the floor, and the hardware must be used within its stated fit and load instructions.
Use slim hangers where they make sense
Slim hangers can recover rod width when bulky plastic or wooden hangers are the bottleneck, but thin is not automatically better for every garment. Heavy coats and structured jackets may need stronger, wider support. Use a uniform hanger style where it helps spacing, then keep appropriate hangers for pieces that need more support.
Protect one long-garment lane
Reserve a full-height lane for dresses, coats, long shirts, or anything that creases when folded over a bar. This is the tradeoff many “double your closet” plans skip. More rails are useful only when your wardrobe is mostly short-hang clothing.
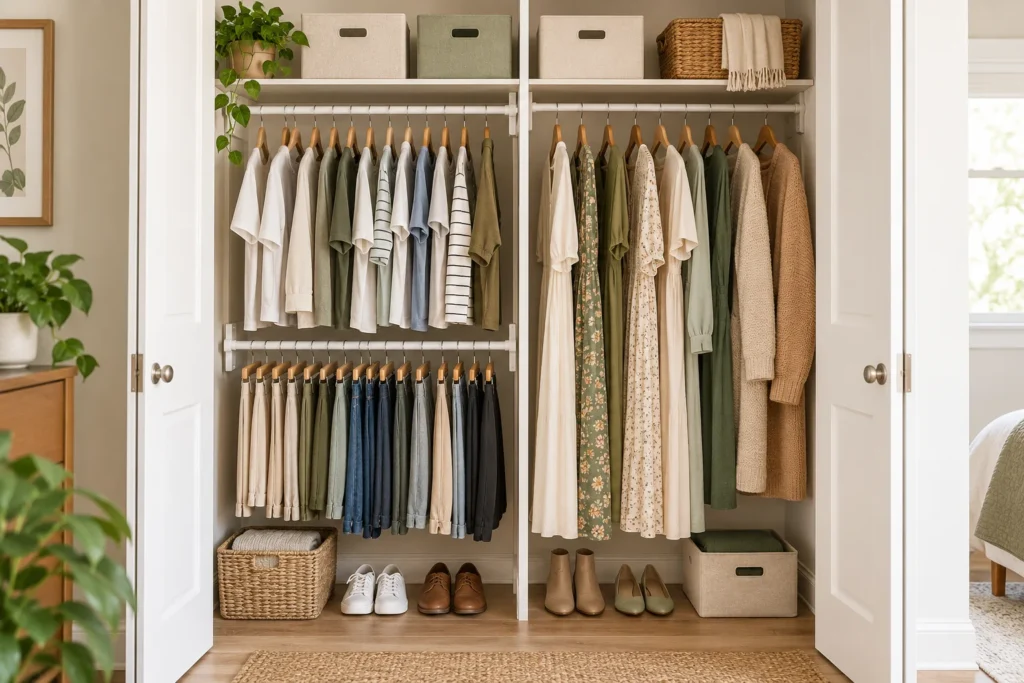
Make the Upper Shelf Easy to Retrieve
The top shelf is often deep enough to hide items behind other items. Avoid building two invisible rows unless you have a pull-forward system that lets the back come forward. One or two correctly sized bins are usually easier to manage than a shelf packed with tiny boxes.
For folded clothing that leans or gets buried, use our small closet shelf organization guide to create stacks you can retrieve without disturbing the rest.
Use bins by job, not by color
Assign each closed bin a job such as “winter accessories,” “special-occasion bags,” or “spare linens.” A label should tell you what is inside without requiring a memory test. Matching baskets are optional. Clear categories are not.
If bags are the category that needs a home, our guide to storing handbags in a small closet covers each bag’s footprint, support and access.
Keep overhead storage light and low-frequency
Put lightweight, less-used items overhead and keep the heaviest objects lower. If a bin is awkward to lift down with one hand, it is probably too heavy or too large for that location. Leave enough empty shelf edge to grip the container safely rather than wedging it tightly between the ceiling and the shelf.
Make the shelf easier, not denser
If items must be removed from the top tier every time you need something below, try a simpler layout. More vertical layers only help when each layer remains accessible.
Use the Floor Without Creating a Shoe Pile
Closet floors often become the overflow zone because they look empty after clothes are hung. Treat the floor like a shelf with a strict boundary. Choose one function first: shoes, a compact drawer unit, one hamper, or a small bin. Trying to fit all four usually recreates the same clutter at a lower level.
Give shoes a measured footprint
Count the pairs that genuinely need closet space, then measure their largest footprint. A narrow rack can keep everyday shoes visible, but tall boots, wide sneakers, and heels do not use identical dimensions. Choose the rack after the shoe count, not before it.
Use our small closet shoe storage ideas to compare layouts against your actual pairs and the available door clearance.
Use drawers only under short garments
Freestanding drawers can work beneath shirts or folded trousers when there is enough vertical drop. Load the hanging rail first, then measure from the lowest hem to the floor. Test drawer opening with closet doors in place. A unit that fits the cavity but cannot open is not usable storage.
If the bedroom has no separate drawer furniture, our guide to storing clothes without a dresser helps assign folded clothing by how often you use it.
Use Door Storage Only When the Door Still Works
The door can be useful storage, but it is also moving hardware. Before adding pockets, hooks, or racks, check the type of door, the top gap, hinge clearance, handle location, and what the organizer will touch when the door is closed. Never solve a storage problem by creating a door problem.
Hinged, sliding and bifold doors need different plans
A full hinged door offers the most obvious surface. Sliding doors usually hide one another and can have very little clearance between panels. Bifold doors fold into the opening, so a thick organizer may interfere with the fold. Use the door you have, not the door shown in an inspiration photo.
Test over-door clearance before loading it
Fit an over-door bracket on the empty door first. Close and latch the door. Check whether the bracket rubs the frame and whether pockets hit shelves, clothing, or the wall. Then add a small load and test again. Door hinges and the organizer both have limits, so follow the specific product instructions.
Our over-the-door closet storage ideas for renters guide walks through bracket fit, closing clearance and a sensible load for the door.
Treat adhesive hooks as surface-specific
Adhesive hooks are not universally damage-free. Surface condition, paint age, texture, preparation, load, and removal technique matter. For example, Command’s own guidance notes that weak, old, uncured, or damaged paint can pull away and that strips should be removed according to the instructions. Check the lease and the product’s approved surfaces before using adhesive inside a rental closet.
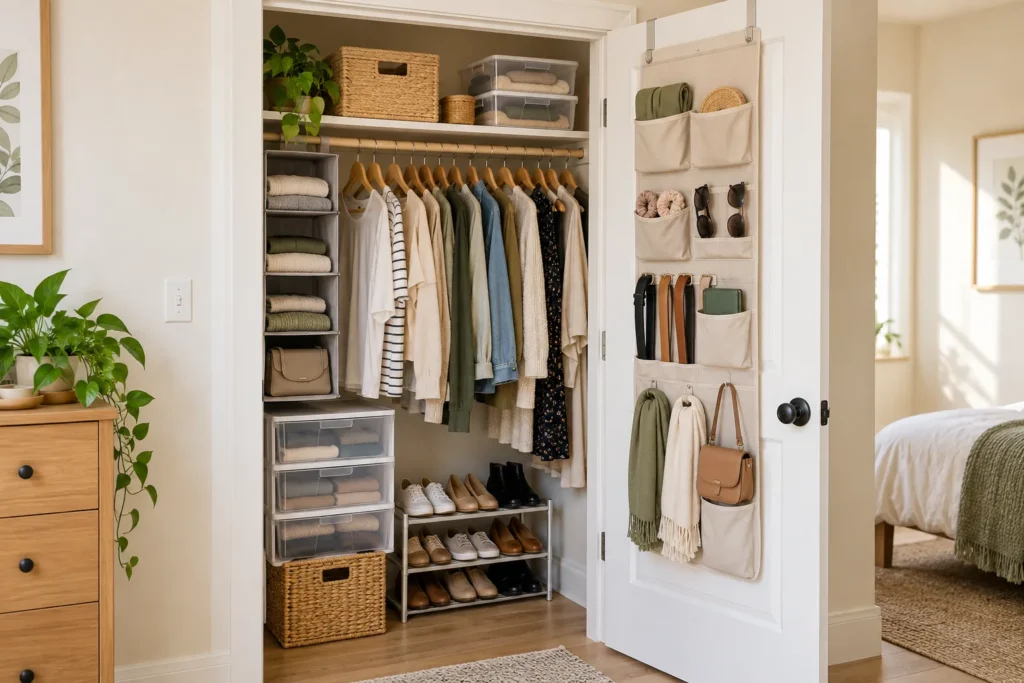
Create Zone 5: Seasonal and Overflow Storage
Seasonal storage should protect prime closet space from clothing you will not touch for months. Move off-season items to a labeled top-shelf bin, under-bed container, or another appropriate dry storage location. Keep the next season accessible enough that rotation is easy rather than a full-day project.
For a repeatable rotation, follow our guide to storing seasonal clothes in a small apartment to label the outgoing group and plan how it returns.
Rotate by the season you are actually entering
Do not rotate by the calendar alone. If your climate stays warm into October, keep transitional layers reachable. Move the pieces you are genuinely unlikely to wear in the next several weeks, then bring them back when your routine changes.
Label closed containers from the front
Label the side of the container you can see from the doorway. “Winter tops, scarves, gloves” is more useful than “seasonal.” If the bin is opaque, add a short inventory note inside the lid so you do not open three boxes looking for one sweater.
Compress only what can safely be compressed
Vacuum bags can reduce the volume of suitable soft goods, but follow garment care guidance and the storage product’s instructions. Do not compress structured hats, delicate embellishments, leather goods, or items that can be permanently creased just to make a stack look smaller.
Compare No-Drill Closet Organizer Types
No-drill closet organization is easier when the organizer type matches the problem. Hanging shelves use the existing rod; freestanding units use the floor; over-door products use door clearance; tension systems depend on their fit and rated load; adhesive products depend on the surface and removal method.
Do not buy all of them. A closet crowded with organizers can lose more usable space than it gains. Start with the bottleneck that causes daily friction, prove the fix for a week, then add the next layer only if a specific problem remains.
Hanging and freestanding organizers
Hanging shelves are useful for folded clothing or soft accessories when the rod can support the combined load. Freestanding drawers and shoe racks are easy to move out, but their full depth and drawer travel must fit behind the door. These options are often the simplest because they do not depend on wall finish.
Tension, adhesive and over-door systems
Tension and clip-on products can add a second hanging level, but fit range and load limits vary by product. Adhesive hooks require approved surfaces and careful removal. Over-door organizers need a door that still closes normally when loaded. “No drill” describes how a product is installed; it does not remove the need for measurement or instructions.
Understand What Renter-Friendly Really Means
A renter-friendly system should be removable, compatible with the actual surfaces and hardware, and easy to take with you. It should also leave the closet usable for the next person. That can mean choosing a freestanding piece even when an adhesive option looks cleaner.
Read the lease before attaching anything
Lease rules vary. Check restrictions on holes, anchors, paint, adhesives, door hardware, and shelf modifications. If permission is unclear, ask before drilling or removing built-in components. Photograph existing chips, loose paint, or damaged shelves before adding anything.
No-drill does not automatically mean no damage
Adhesives can fail or remove finish; tension products can mark soft surfaces or slip when overloaded; over-door brackets can rub trim. Use protective pads only if the manufacturer allows them, stay within rated capacities, and stop if a system shifts after loading.
Keep heavy and valuable items on verified support
Store heavy bins, valuables, glass items, and frequently handled objects on stable support. Avoid placing breakable or irreplaceable items on uncertain overhead mounts. A renter-friendly closet should reduce risk as well as clutter.
Three Example Closet Setups
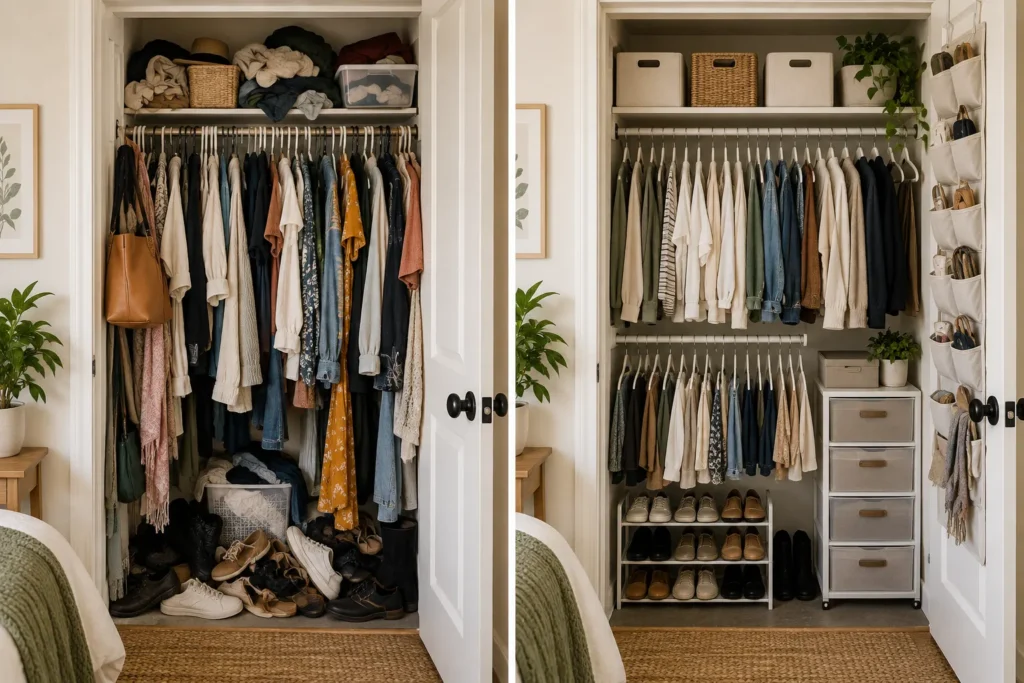
These examples show how the same five-zone plan changes with the room. A third common setup is a narrow wardrobe-style closet with no useful door storage: keep one long-hang lane, use a hanging shelf for folded items, and put shoes in a compact vertical rack rather than forcing an extra drawer unit into the opening.
Setup A: one rod, one shelf, hinged door
Daily hanging: center of the rod. Upper shelf: two labeled light bins. Floor: low shoe rack plus a small drawer tower under shirts. Door: lightweight accessories in an over-door organizer after a full closure test. Seasonal: top-shelf bin or under-bed container. This layout works well when the door opens fully and there is enough depth for drawer travel.
Setup B: shallow closet with sliding doors
Skip thick over-door storage because the panels need to slide. Keep the center of the rod for daily clothing, reserve one side for long garments, and use the floor only where the moving panel does not block retrieval. A shallow bin on the upper shelf may work better than a deep basket because it can be pulled forward without reaching behind a door panel.
Avoid the Two Most Common Small-Closet Mistakes
The most common failure is treating capacity as the only goal. If the closet technically holds more but getting dressed requires moving bins, lifting stacks, and opening two organizers to reach one shirt, the system has become storage-heavy and routine-light.
Do not fill every empty inch
Leave small gaps on the rod, shelf, and floor. Laundry needs somewhere to return. A new pair of shoes needs a temporary landing spot. Open space is what prevents one busy week from undoing the whole setup.
Do not buy a matching system before measuring
Matching baskets and drawer towers can look calm, but a beautiful set is still wrong if it blocks the door, wastes depth, or leaves long clothes on the floor. Measure each zone, solve the awkward dimension first, and let appearance come after fit.
Match the Storage Type to the Problem
Use the table as a starting point, not as a shopping list.
| Problem | Consider | Verify first |
|---|---|---|
| Short garments fill one rod | Removable lower hanging rail | Vertical drop, fit range, load |
| Folded items collapse on shelf | Hanging cubbies or shelf dividers | Rod/shelf capacity and usable width |
| Shoes cover the floor | Low rack or vertical shoe tower | Largest pair depth and door clearance |
| Accessories disappear | Door pockets or removable hooks | Door type, surface, closing gap |
| Seasonal clothes use prime space | Labeled upper bin or secondary storage | Weight, retrieval, garment care |
| Shirts leave empty space below | Freestanding drawers | Hem clearance and drawer travel |
If the rod is crowded
If hangers are compressed so tightly that you cannot slide them apart, edit the wardrobe before adding another rail. Then group short garments. A lower rail is most useful when enough of the wardrobe is short enough to create a true second level.
If the shelf or floor is chaotic
If the top shelf is a mystery pile, use fewer, larger categories rather than many tiny boxes. If the floor is chaotic, solve shoes first or add one drawer unit. Do not build both systems at once until you know how much floor depth the first solution consumes.
A Simple Pre-Buy Closet Checklist
- Remove clothing and objects that no longer belong in the closet.
- Measure usable width, depth, height, rod position, top-shelf depth, and floor space.
- Measure short-garment and long-garment drop.
- Open every closet door fully and record the blocked areas.
- Choose one daily-access zone for the clothes you wear most.
- Keep one full-height section if you own long garments.
- Count shoes before choosing a rack.
- Check the lease before drilling, removing hardware, or using adhesive.
- Read the organizer’s fit range, load limit, mounting instructions, and removal directions.
- Test drawers, doors, and hanging rails after the organizer is loaded.
- Leave some open space for laundry to return.
- Keep receipts and packaging until the setup has survived a normal week.
Small Space Scout rule: if an organizer makes another part of the closet harder to use, it has not added usable storage.
Use a Five-Minute Weekly Closet Reset
A small closet stays functional through short resets, not occasional overhauls. Once a week, return shoes to their row, put clean clothes back in the correct hanging section, refold the one shelf stack that is starting to lean, and remove anything that has landed on the floor without a home.
Keep a donation bag somewhere outside the prime closet zone. When an item repeatedly gets skipped because it no longer fits your life, move it to the bag rather than forcing it back between everyday clothes. Empty the bag on a regular schedule.
Seasonal changes need a slightly longer reset, but the same rule applies: move the next group of clothing forward and move low-frequency pieces back. Do not reorganize every container just because the weather changed.
Frequently Asked Questions
How do I organize a small rental closet without drilling?
Start by editing the contents and measuring the existing rod, shelf, floor, and door. Use removable options such as hanging shelves, freestanding drawers, shoe racks, or a compatible second hanging rail only where the measurements support them.
What should I organize first in a small closet?
Organize the daily hanging zone first. The clothes you wear most should be easiest to see and return. After that, solve the floor or top shelf based on whichever area creates the most daily friction.
Can I add a second closet rod without drilling?
Possibly. Clip-on or tension-based systems exist, but their fit range, installation method, and rated load vary. Measure the closet and garment drop, follow the product instructions, and keep long garments out of the doubled section.
Are adhesive hooks safe for rental closets?
Not automatically. Adhesives depend on surface type, paint condition, preparation, load, and removal technique. Check the lease and use only products approved for the surface. Follow the manufacturer’s application and removal instructions exactly.
What should go on the top shelf of a small closet?
Use the upper shelf for lighter items you need less often, such as seasonal clothing, spare soft goods, or occasional accessories in labeled bins. Keep heavy and awkward objects lower so retrieval is simpler.
How do I organize shoes in a tiny closet?
Count the pairs that need to live there and measure the largest shoe. Use one measured rack, a narrow vertical tower, or a small number of boxes. Keep the pairs you wear most at the easiest height.
How much empty space should I leave?
There is no universal percentage, but leave enough room that hangers can slide, bins can be gripped, drawers can open, and clean laundry can return without creating a new pile. A closet that is packed to its physical maximum is usually below its practical maximum.
Make the Closet Easier to Use, Not Just Fuller
The best small closet organization ideas for renters do not begin with products. They begin with a realistic inventory, exact measurements, and a decision about what deserves the easiest reach. Build the daily hanging zone first, protect the long-hang space your wardrobe actually needs, and use the top shelf, floor, and door only when each remains accessible.
Then add one removable solution at a time. Test it with normal laundry, normal door movement, and normal rushed mornings. A system that survives real use is more valuable than one that looks perfect for a weekend.
As we build the rest of this closet series, you can follow the Closet Organization collection. If you are organizing the rest of a rental, our small kitchen storage guide for renters and small bathroom storage guide for renters use the same measure-first, no-drill approach.